Project timelines are a necessary evil in the world of business. They can help you keep track of your progress, make sure all the stakeholders are on the same page, and ensure that your project finishes on time and on budget.
However, creating a good project timeline is easier said than done. In this blog post, we’ll give you some tips on how to create a project timeline that will help you achieve your goals. 🎯
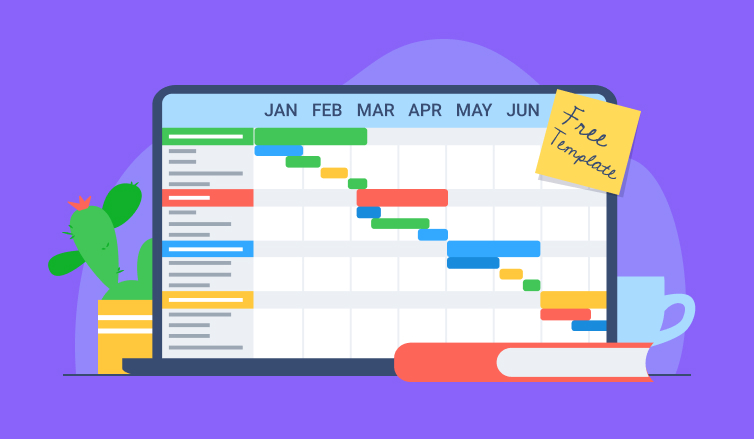
By the way, we prepared a free downloadable Project Timeline Template for you (look for it at the end of the article). But before you commence creating a timeline for your own project, let’s explore the design process in detail to demonstrate which elements you must include in the timeline in order to get the best out of it.
What Is a Project Timeline and How Can It Help You as a Manager?
A project timeline is a visual representation of the chronological order of activities, tasks, and milestones within a project. It outlines the planned start and end dates for each activity, providing a clear overview of the project’s progress and key deadlines.
Project timelines help teams and stakeholders understand the order and duration of project activities. They enhance planning, coordination, communication, and risk management ensuring that projects are delivered on time and within budget.
An elaborate project timeline allows a project manager to facilitate successful project execution in many ways including:
- Planning and organizing project activities in a logical sequence. Timelines provide a visual representation of the project’s duration, dependencies, and milestones, ensuring that tasks are scheduled appropriately, and resources are allocated efficiently.
- Identifying task dependencies, which are the relationships between different project activities. These are crucial for determining the critical path, which is the sequence of activities that, if delayed, would delay the overall project.
- Prioritizing critical tasks and managing project risks. By visualizing the project schedule, project managers can assess the impact of delays or changes, analyze potential risks, and develop contingency plans.
- Allocating resources effectively. Timelines make it to identify potential resource conflicts or bottlenecks and adjust the schedule accordingly.
- Understanding when specific deliverables or milestones are expected. Timelines also serve as a reference point to track progress and ensure that project milestones are met on time.
- Facilitating effective communication with stakeholders and managing stakeholder expectations by ensuring everyone is on the same page regarding project timelines and objectives.
- Tracking project performance. By comparing actual progress against the planned timeline, project managers can identify delays or deviations early on and take corrective actions.
9 Main Types of Project Timelines
The choice of project timeline type depends on the project’s complexity, team preferences, and the level of detail required for planning, tracking, and communication.
Below you will find an overview of the most popular formats. However, project managers often use a combination of these to effectively build and convey project schedules to stakeholders.
1. Linear or sequential timeline
This one is the simplest type of project timeline – it depicts all your project tasks in chronological order and shows the history or progression of work. Due to its simplicity, linear or sequential timelines are appropriate for small projects with just a few tasks.
❕ Pros and cons:
Linear timelines are easy to create and understand. Additionally, they can be visually appealing and help to engage viewers.
However, if your project tasks are interrelated with each other in a more complicated way than just a straightforward chronological sequence, a linear timeline won’t be able to reflect that. Therefore, this type of timeline may not be best suitable for large and complex projects with intricate task dependencies.
2. Gantt charts
A Gantt chart is a graphical representation of your project’s tasks, organized by time. Each task is represented by a bar, and the bars are aligned horizontally to show the sequence of tasks. The length of each bar corresponds to the estimated duration of the task.
Gantt charts are commonly used in project management to visually track progress and milestones. And they are appropriate for any type of project, big or small.
❕ Pros and cons:
With the help of a Gantt chart, you can:
- See the big picture and understand how all the tasks in your project fit together.
- Easily spot potential bottlenecks and problem areas.
- Communicate project plans to stakeholders and team members.
- Track progress and revise plans as needed.
Nevertheless, Gantt charts have a few disadvantages. They can:
- Be time-consuming to create.
- Be difficult to maintain and update as projects change and evolve.
- Give a false sense of precision and accuracy if not used carefully.
3. Critical path method
This technique offers a more sophisticated approach to project scheduling that takes into account the dependencies between task. It identifies the sequence of activities that must be completed to finish a project on time.
In this type of timeline, tasks are represented by nodes, and the dependencies between tasks are represented by arrows. The longest sequence of tasks from start to finish is called the critical path and it indicates the minimum amount of time needed to complete the project.
❕ Pros and cons:
The critical path method can help you:
- Better understand how long a project will take to complete.
- Identify which activities are most important to complete the project on time.
- Create a schedule that includes buffer time in case an activity takes longer than expected.
However, not all projects are suited to the critical path method – some projects may be too small or too simple to warrant using this technique. You also need be aware of the risk of potential for human error – since the critical path method involves identifying and sequencing a large number of activities, there is potential for human error when creating the schedule.
Besides, remember that the critical path can change over time. As a project progresses, the sequence of activities that make up the critical path can change. This means that the schedule created using the critical path method may need to be updated as the project progresses.
4. Program evaluation and review technique (PERT)
PERT is a network-based technique that uses a graphical representation of the project to predict its completion time. A PERT timeline is typically composed of three elements:
- Events – Milestones that mark the beginning or end of one or more activities.
- Activities – Tasks that need to be completed in order to achieve the project’s objectives.
- Dummy activities – Logical relationships / dependencies between events and activities.
Each event and activity is represented as a node on the PERT diagram. The nodes are connected by arrows that indicate the order in which the activities must be carried out.
❕ Pros and cons:
The advantage of using the PERT technique is that it provides a clear visual representation of the project and makes it easier to plan and manage work. Additionally, the PERT technique can be used to generate realistic estimates of the project’s completion time, which is helpful for making decisions about resource allocation and scheduling.
The disadvantage of the technique is that it can be time-consuming and requires a certain amount of knowledge about project management. Additionally, the accuracy of the PERT technique depends on the quality of the information used to create it.
5. Calendar-Based Timeline
A calendar-based timeline showcases project activities and milestones within a traditional calendar format. It highlights specific dates for each task, allowing for a more intuitive understanding of time-related dependencies and deadlines. Calendar-based timelines are useful for projects with fixed date requirements or time-sensitive deliverables.
❕ Pros and cons:
The main benefit of calendars is that everyone is familiar with them, so they can be easily shared and understood by all the parties involved. Apart from that, most modern calendars offer a wide variety of integrations with messengers, scheduling tools, and so on.
But still, calendars do not fit for complex projects with multiple overlapping tasks as they are quite limited in displaying task dependencies and critical path analysis not to mention resource allocation or workload distribution.
6. Swimlane Diagram
A swimlane diagram organizes project tasks and responsibilities based on different team members, departments, or stakeholders. It provides a visual representation of workflow across various stakeholders, highlighting task ownership and handoffs. Swimlane diagrams promote collaboration, communication, and accountability within a project.
❕ Pros and cons:
Swimlane diagrams are great for the identification of bottlenecks or areas for process improvement, especially when it comes to projects involving multiple teams or stakeholders.
However, they may not provide a comprehensive view of the entire project timeline and require careful maintenance and updates to reflect changes in task assignments.
7. Agile Sprint Timeline
In Agile project management, sprint timelines are used to illustrate the time-bound iterations or sprints within a project. These timelines typically show the length of each sprint, including planned activities and deliverables. Agile sprint timelines emphasize iterative development, continuous improvement, and flexibility in project planning.
❕ Pros and cons:
Agile sprint timelines are highly flexible and can be easily adapted to almost any project needs, but only as long as you strictly follow the methodology.
Using them for non-Agile projects may require additional tools or practices.
8. Milestone Timeline
A milestone timeline focuses on the major milestones or key events within a project. It provides a simplified view of the project schedule, highlighting significant achievements or deliverables. Milestone timelines are useful for high-level project planning, stakeholder communication, and tracking project progress.
❕ Pros and cons:
Though the milestone timeline helps visualize project progress in the simplest way possible and is extremely easy to create and interpret, it acks detailed task-level information and does not show dependencies or task sequencing. It also may not provide sufficient information for resource allocation or task management.
9. Kanban Board
A Kanban board is a visual representation of project tasks organized into columns representing different stages of progress, such as “To-Do,” “In Progress,” and “Completed.” It provides a real-time snapshot of the project’s status, team workload, and task assignments. Kanban boards promote streamlined task management and facilitate continuous workflow improvement.
❕ Pros and cons:
Kanban boards facilitate real-time tracking of task statuses and workload. They promote collaboration and transparency within teams and can be easily customized to fit different project needs.
On the other hand, they are only effective, when all team members are equally involved in the progress-tracking process.
How to Design an Excellent Project Timeline in 7 Steps
Overall, a well-developed project timeline can offer you a plethora of benefits. In addition, it is very easy to make.
You can use a specialized piece of project timeline software or simply open an Excel spreadsheet, create a table, follow the general design rules, and fill your data in.
To develop a perfect and credible timeline, you need to be fully aware of project specifics, goals, and requirements. In essence, you must have a complete and thorough project plan with estimates for each task.
To attain that, just follow these seven steps:
1. Define project scope
A scope statement sets project boundaries and explains what your team is expected to produce by the end of the project.
For instance, if you want to develop an app, a scope statement (in its very basic form) will clarify which particular purposes that app will serve and which features it will include: “We’re going to create a social media app for art lovers. It will allow users to talk to each other through text messages and video calls, share their creations in posts, search for collaboration opportunities with brands, participate in discussion groups and creative competitions.”
In other words, at this step, you need to identify general project characteristics, directions, goals and objectives.
2. Elaborate a work breakdown structure and formulate tasks
Once the scope statement is made, you need to break down general project goals and deliverables into smaller components, also known as work packages. After that, these sub-deliverables are broken down into even smaller pieces of work – tasks.
Assume the app development example again. The project’s general deliverables are equated to the app’s various features recounted in the scope statement: video chat, discussion groups, posting, etc. Work packages for each of them will be as follows:
- Architecture specifications,
- Programming,
- Feature testing.
Note that although work packages for various goals in the provided project example are identical to a substantial degree, they might differ in other types of projects that are less standardized and more creative in nature.
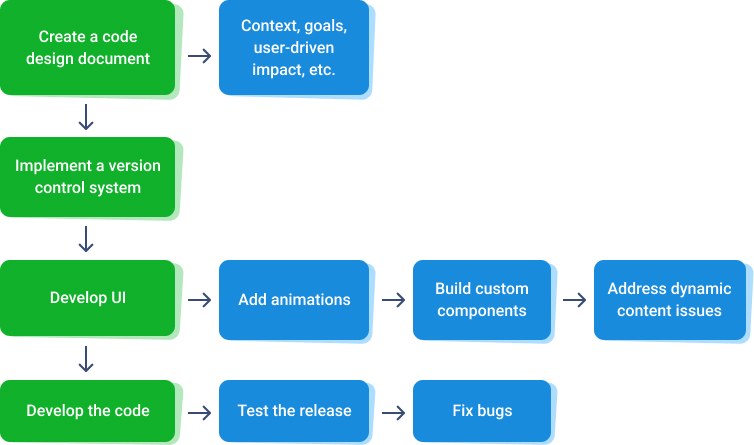
Anyways, with sub-deliverables at hand, you can proceed to task formulation. Here is a brief list of those involved in work package 2 – Programming:
- Create a code design document,
- Select and implement a code control system,
- Develop user interface (UI),
- Develop code, etc.
Overall, you need to divide general project deliverables into very precise and specific to-dos. By using work packages as an interim output in this process, you can accomplish this step much more accurately, without missing a thing.
3. Identify task dependencies
Task dependency means a strict relational order in which every task in the project should be performed. That is to say, you can’t start working on some things before others are completed.
You can’t begin to code the app before thinking through its functional and technical specifications. Therefore, you need to set the right performance priorities and clarify which of the tasks must be fulfilled first.
At this step in the planning process, be sure to use flowcharts – they are perfect for visualizing task dependencies and make it much easier to comprehend information. The diagram can be as simple as an example below. However, more complex projects will usually call for a more sophisticated representation of task dependencies.

4. Estimate time for tasks
Now it’s the moment to estimate how many hours every task may take to accomplish. There’s a great variety of estimation techniques that will readily help you with that. Try to choose the one that provides as accurate forecasts as possible. Take into account both the best-case and worst-case scenarios (including relevant risks and uncertainties) and add some buffer time to your estimates if required.
5. Assess resource availability
Determine which resources you must have in order to deliver the projectand analyze their current and future availability. Pay special attention to your workforce resources since, as a rule, their availability is more dynamic than of other resources.
Employees don’t work 24 hours a week. They have days off and go on long vacations once in a while. If you implement flexible work arrangements in your company and let your team members freely choose when to be at the workplace and for how long, it can become even more challenging to predict the number of workers available in the long term.
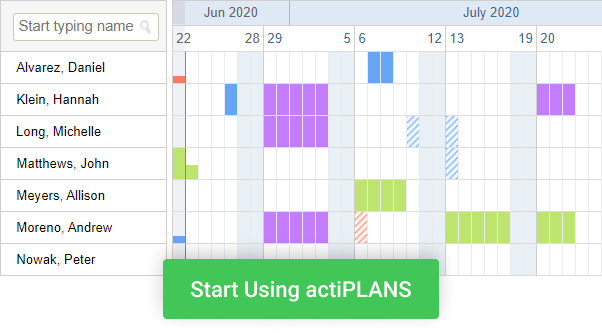
To analyze workforce capacities both before and during project realization and avoid project delays, consider using a specialized schedule and leave management tool, such as actiPLANS. It will enable your team members to plan time off in advance and help you monitor how many of your workers scheduled to be on duty for any period.
After you’ve got all the necessary information regarding your employees’ availability, use it to forecast time required for task completion in days and months. What you have to do here is take your initial hour-based estimates and apply them to your team members’ schedules: if the fulfillment of a task is expected to take 40 hours, and a responsible employee works merely 5 hours a day during a standard 5-day workweek, you should set a deadline in at least a week and 3 days.
6. Decide on project milestones
A project milestone is a point in the course of project realization that signifies an important accomplishment – anything from the commencement of work on a series of tasks or the completion of a work package. In other words, a milestone symbolizes a progress point that you can use to assess your performance. Note that milestones should be timebound. Incorporate them into your project schedule along with task deadlines.
7. Create a timeline
Knowing your project tasks, their dependencies, milestones and time estimates, you can proceed to the final and the most exciting step – timeline design:
- List all the planned activities in chronological order on the spreadsheet. You may group them by work packages if some tasks will be performed simultaneously by different team members.
- Create a linear timescale with important dates clearly identified. Include both the milestone dates and the first / last days of the month.
- Indicate the duration for each of your project tasks with color blocks.
Now, your project timeline is completed!
Check out our free Project Timeline Template to see the above three steps executed in the Excel format. Use it as a reference point for creating your own timeline, adjust the chart’s contents to suit your needs and fill the data in.
General Rules
To make sure your timeline serves its purpose well, follow these general guidelines:
- Apply color codes to distinguish between different tasks, unite similar ones or indicate their statuses (in-progress, under review, completed, etc.). Create a color code system and use it consistently throughout the document.
- Below the timeline, you may add a comprehensive table with all the relevant information about project work packages (task categories), tasks, start and end dates, color codes applied. The aim of such a table is to collect and systematize project data and to provide readers / viewers with an explanation about how the timeline is organized.
- Track time and work progress to stimulate team compliance with the created timeline, detect any risks of delays promptly and make schedule adjustments if necessary.
Note that one of the best ways to track project progress and employees’ adherence to time estimates is by implementing a time tracking tool, such as actiTIME. This high-quality piece of timesheet software allows users to record how many hours they spend on different activities daily, analyze time use behaviors and receive automatic notifications whenever the risk of schedule overrun arises. Thus, actiTIME can assist you and your team in attaining better project outcomes.
Ready to give actiTIME a try? Sign up for a 30-day trial and start to improve your project-related time management practices absolutely for free.


